The First of Many
My very first quilt is finished! Binding and all!
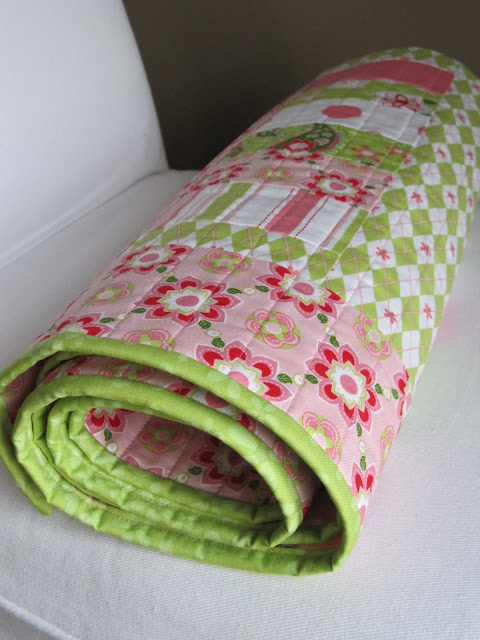
 The back is pieced with the same fabrics from the front. I have to admit that the binding is a little sloppy although you can't tell from the pictures. I wanted to experiment with machine stitching the binding to the back of the quilt instead of hand sewing it, which is something I still need to learn how to do. Rita from Red Pepper Quilts has a great tutorial on her blog for machine stitching the binding. (just search for binding tutorial on her blog). Her directions were easy to follow and I really liked the idea of not having to mess with hand sewing. You machine stitch the binding to the front of the quilt, just like with the traditional method, but when you fold the binding over to the back of the quilt you stitch in the ditch on the front of the quilt which catches the binding on the back. Rita explains it much better, but that is the general idea. I think I would have liked it better if I had used thread that matched the binding in my bobbin (which the directions tell you to do- unfortunately my thread stash does not include neon green thread). But, I would definitely try this method again. I am sure with practice, I would master this method.
 I couldn't wait to get this quilt in the wash to give it that soft crinkly look that I love, and straight from the dryer it is perfect! It's just waiting to be used!
 I am completely hooked. If I had any doubts before, now I know that this quilt is only the first of many in my future.

I quilted it with straight vertical lines spaced about 1 inch apart. At first, I thought the lines might be spaced too close together, but I really liked the effect once it was completely finished. It adds so much texture to the quilt and really makes the fabric stand out.
 The back is pieced with the same fabrics from the front. I have to admit that the binding is a little sloppy although you can't tell from the pictures. I wanted to experiment with machine stitching the binding to the back of the quilt instead of hand sewing it, which is something I still need to learn how to do. Rita from Red Pepper Quilts has a great tutorial on her blog for machine stitching the binding. (just search for binding tutorial on her blog). Her directions were easy to follow and I really liked the idea of not having to mess with hand sewing. You machine stitch the binding to the front of the quilt, just like with the traditional method, but when you fold the binding over to the back of the quilt you stitch in the ditch on the front of the quilt which catches the binding on the back. Rita explains it much better, but that is the general idea. I think I would have liked it better if I had used thread that matched the binding in my bobbin (which the directions tell you to do- unfortunately my thread stash does not include neon green thread). But, I would definitely try this method again. I am sure with practice, I would master this method.
  I couldn't wait to get this quilt in the wash to give it that soft crinkly look that I love, and straight from the dryer it is perfect! It's just waiting to be used!
 I am completely hooked. If I had any doubts before, now I know that this quilt is only the first of many in my future.

Comments
Post a Comment